Since I bought a nice second-hand DSLR from my buddy Emily over at SpatialDrift I’ve been slowly but surely figuring out how to take nicer pictures. For both this blog and my baking blog, n00bcakes, I have a habit of taking pictures in the evenings when the light is at best “sub-par”; I finally took some time to figure out the best way to light my baking creations and other various objects I have lying around the house (because how else am I going to learn, amirite?).
After about 2 seconds of Googling, I found a great and basic site that explained how to light on the cheap. Happy Soda: Figure on Cheap Lighting uses a scantily-clad anime figurine as a basic example on how to light well without breaking the bank and so far it’s working alright.
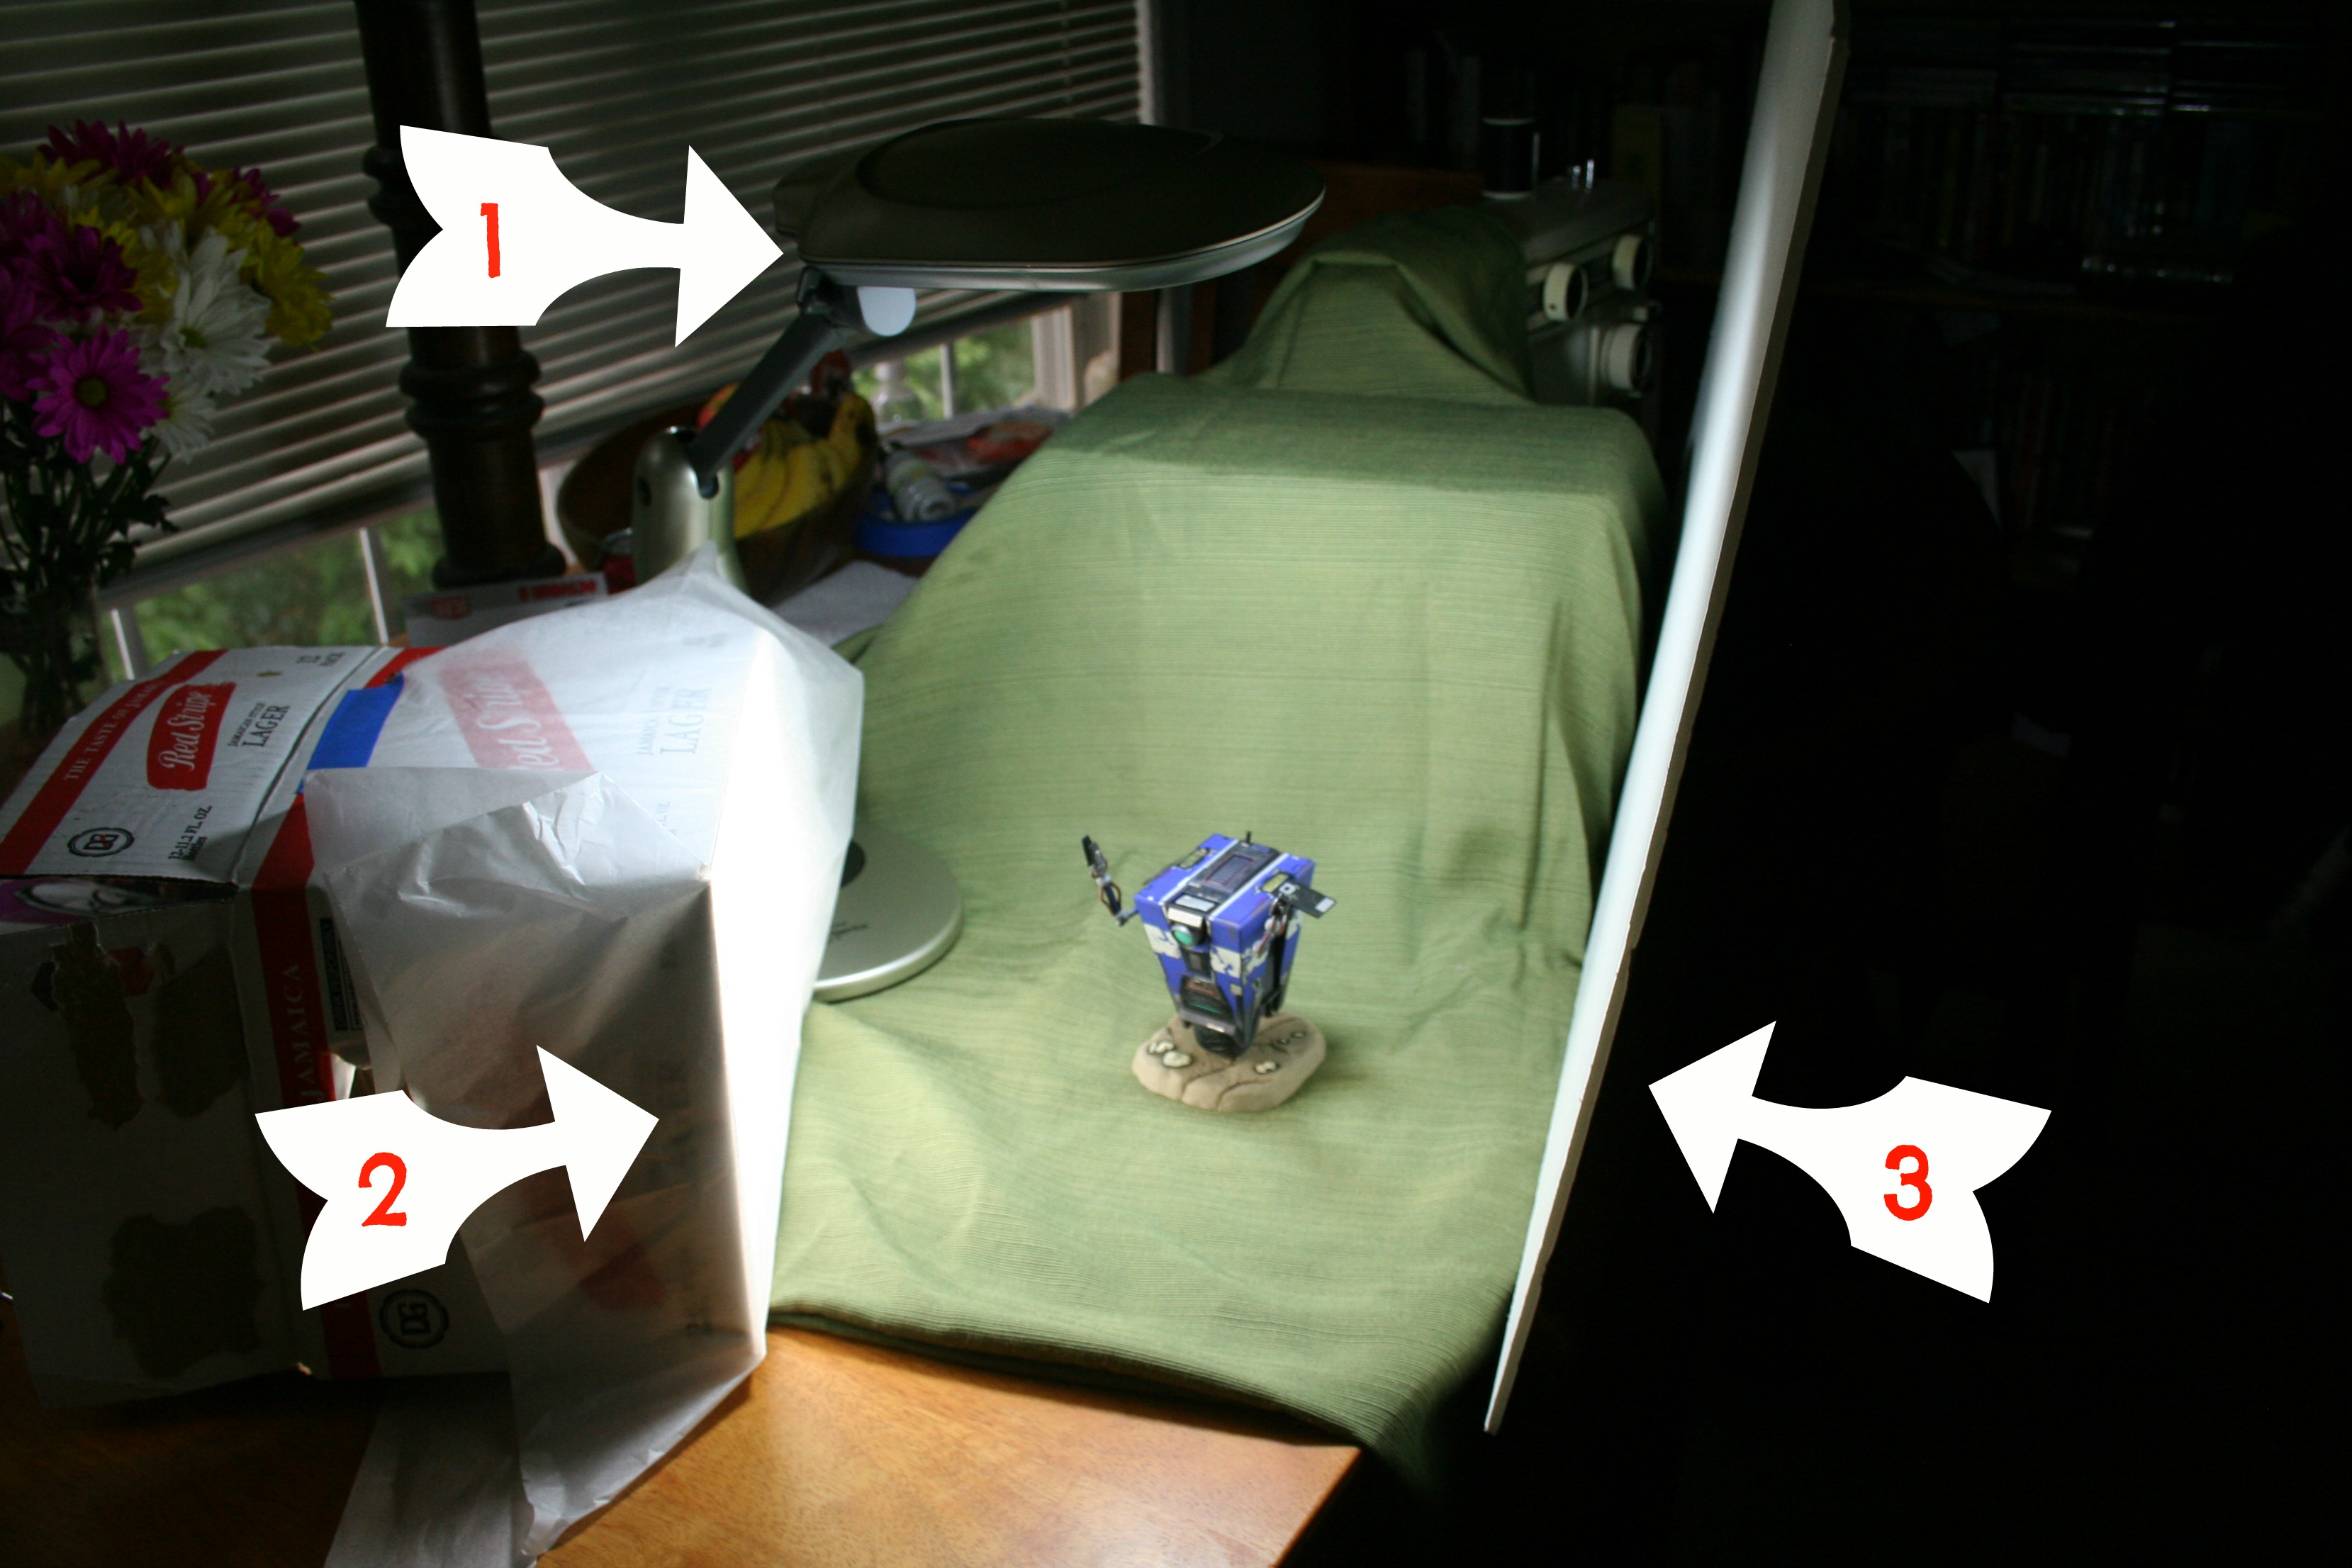
Lighting Setup with Claptrap
This is my initial setup. Happy Soda suggests 2 daytime-style lights, one angled from the top (1) and one from the side through a diffuser of tracer paper (2). Additionally there’s a light reflector of generic foam board on another side to lighten any dark shadows the 2 lights produce (3).
And luckily, getting all of these materials doesn’t have to cost millions of dollars! I bought everything but the desk lamp from either The Home Depot or my close-by crafting store, Michael’s:
- Full Spectrum Desk Lamp: $35
- Full Spectrum light bulbs, 4 pack: $8
- 8″ dish light: $13
- Foam board, tracer paper, painter’s tape: ~$10
- Total: ~$66
(Empty box of Red Stripe for diffuser: $12 + 1 evening of drinking with friends. Or by yourself, whatever.)
With any luck you’ll already have some of these items lying around, or you’ll be able to find a few of them on sale instead of paying full price. For more specifics on the types of light bulb to use I’d read the Happy Soda article, but suffice it to say you want bulbs listed as daylight; make sure to double-check that they have a color temperature of 5000 – 6ooo K, as “daylight” apparently doesn’t always mean the same thing to all brands.
As compared to my frequently too-dark or too-yellow pictures, this first try at indoor lighting worked really well; the photos are far more naturally colored and the shadows aren’t nearly as stark and distracting. I still need to find a better backdrop instead of my tablecloth, but hey – baby steps.
To test the lighting out I used a few of my gaming statues/figurines/collectibles…whatever:

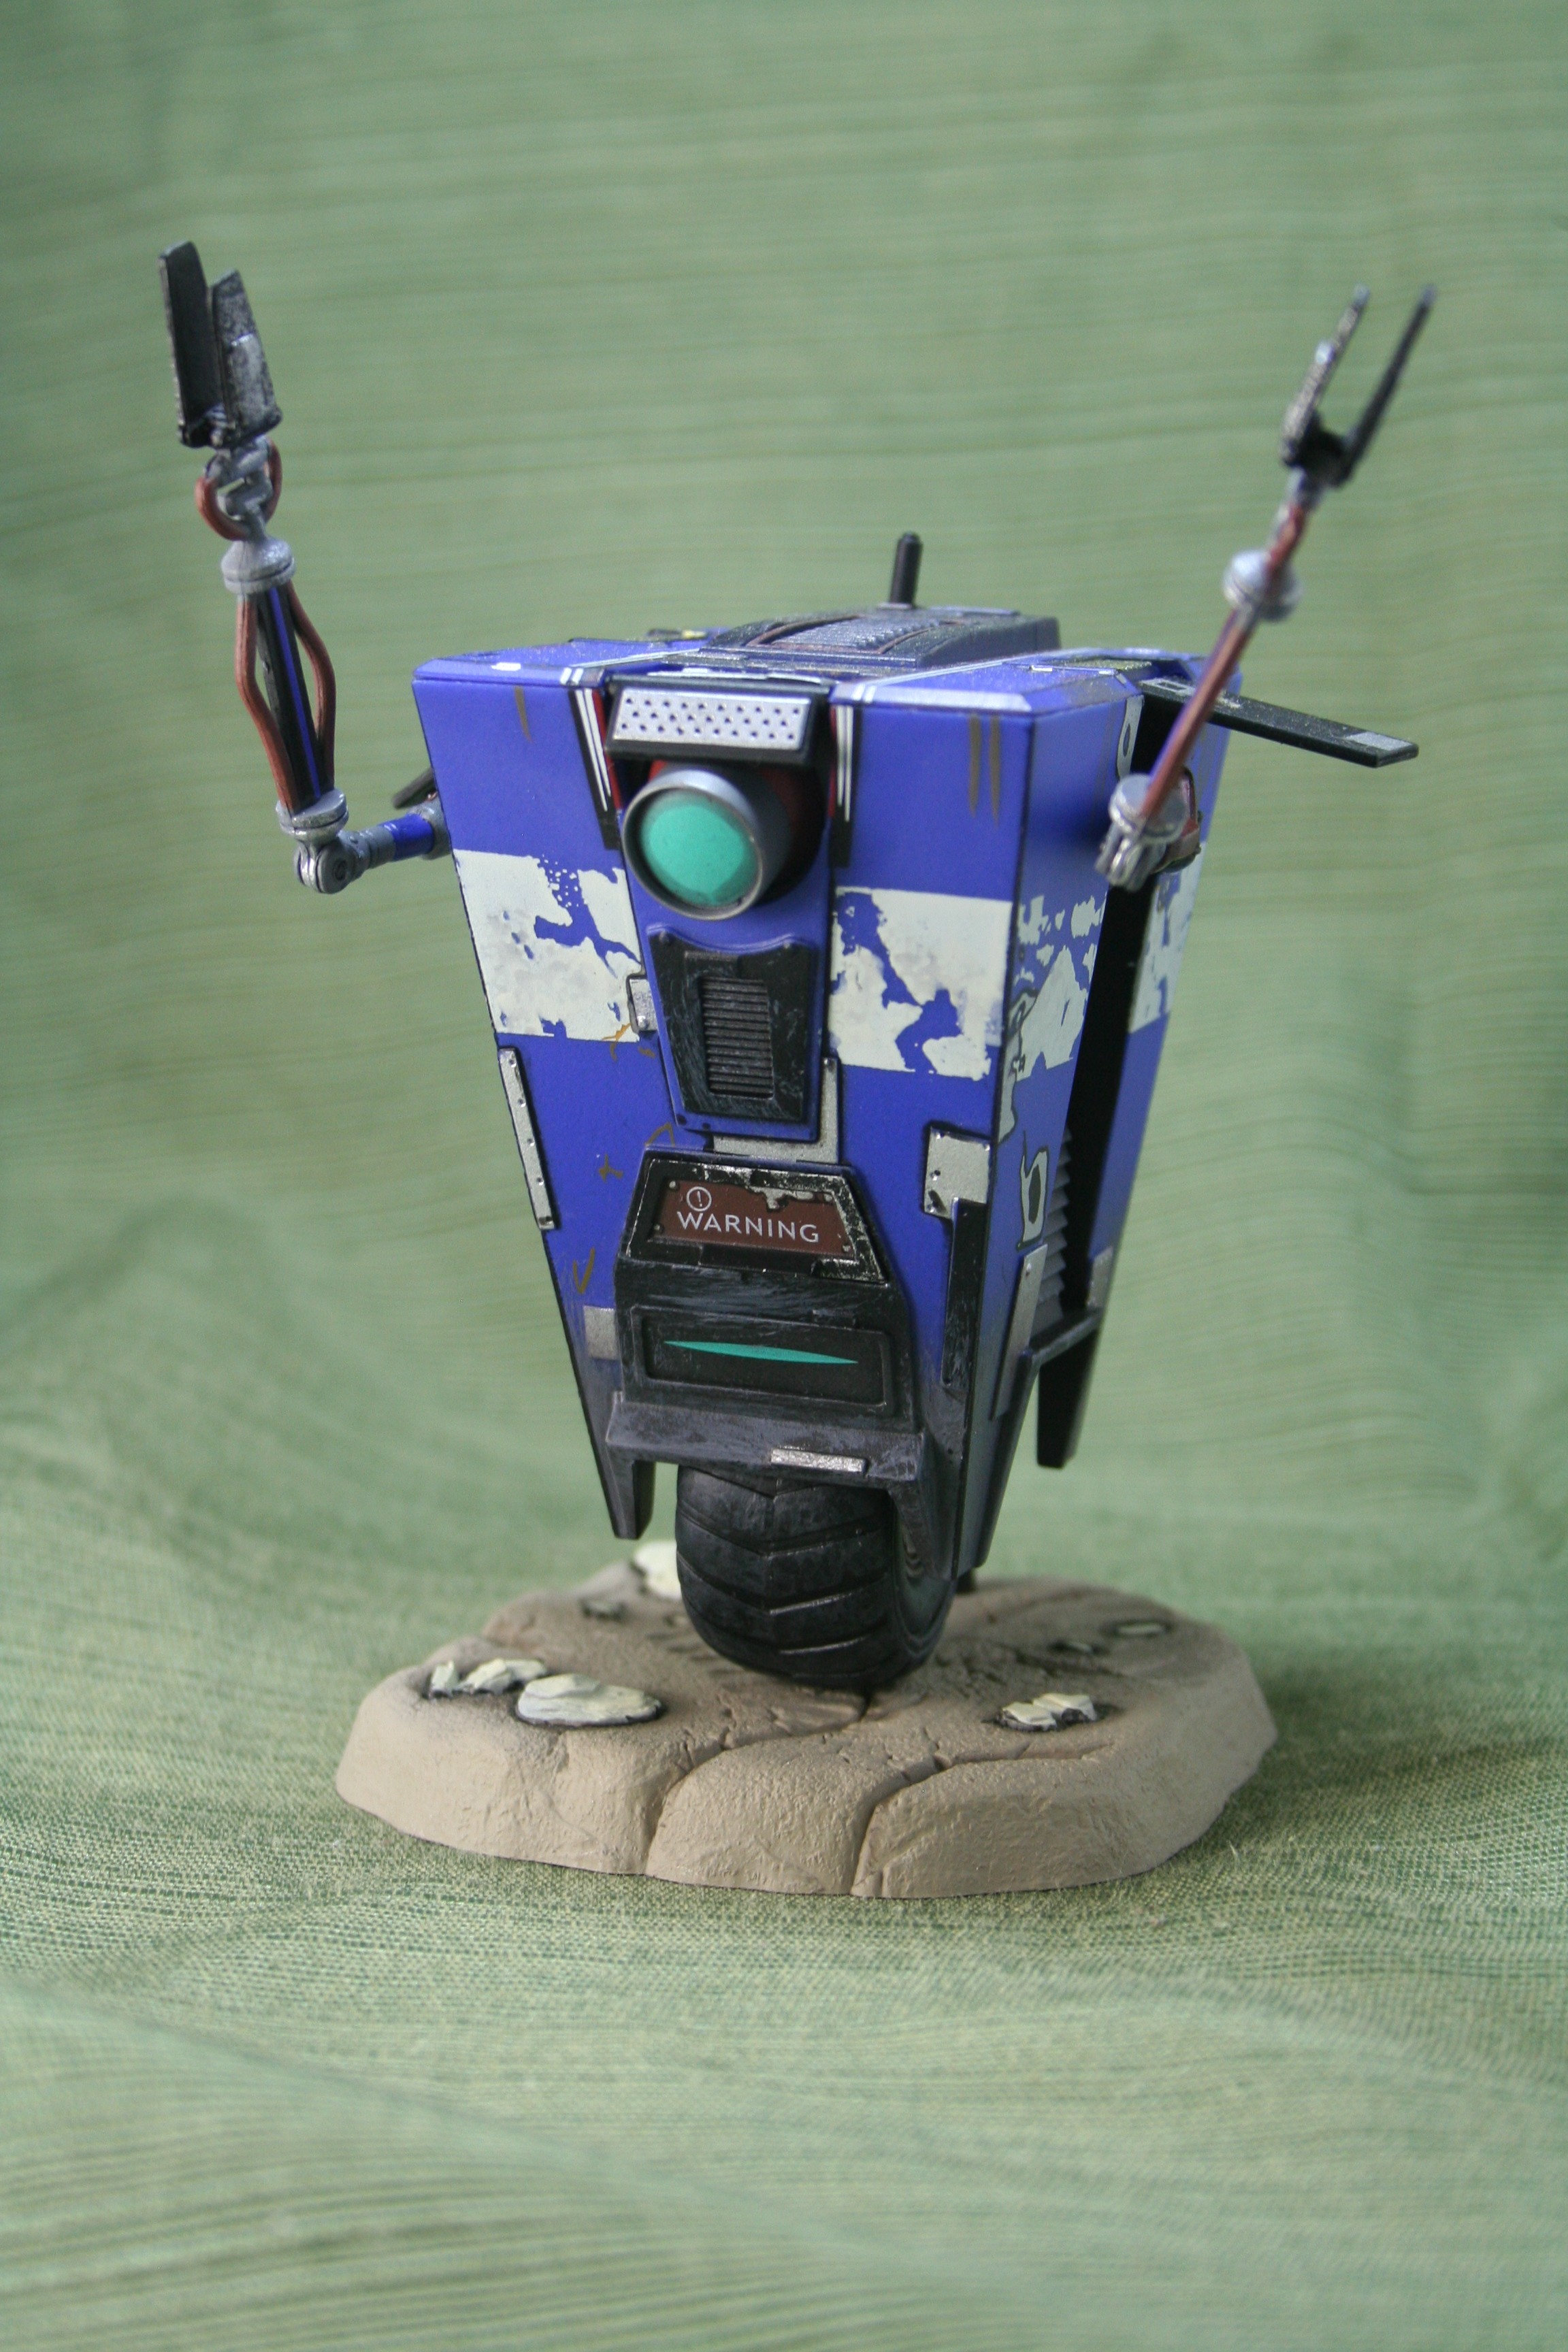
Claptrap – Borderlands
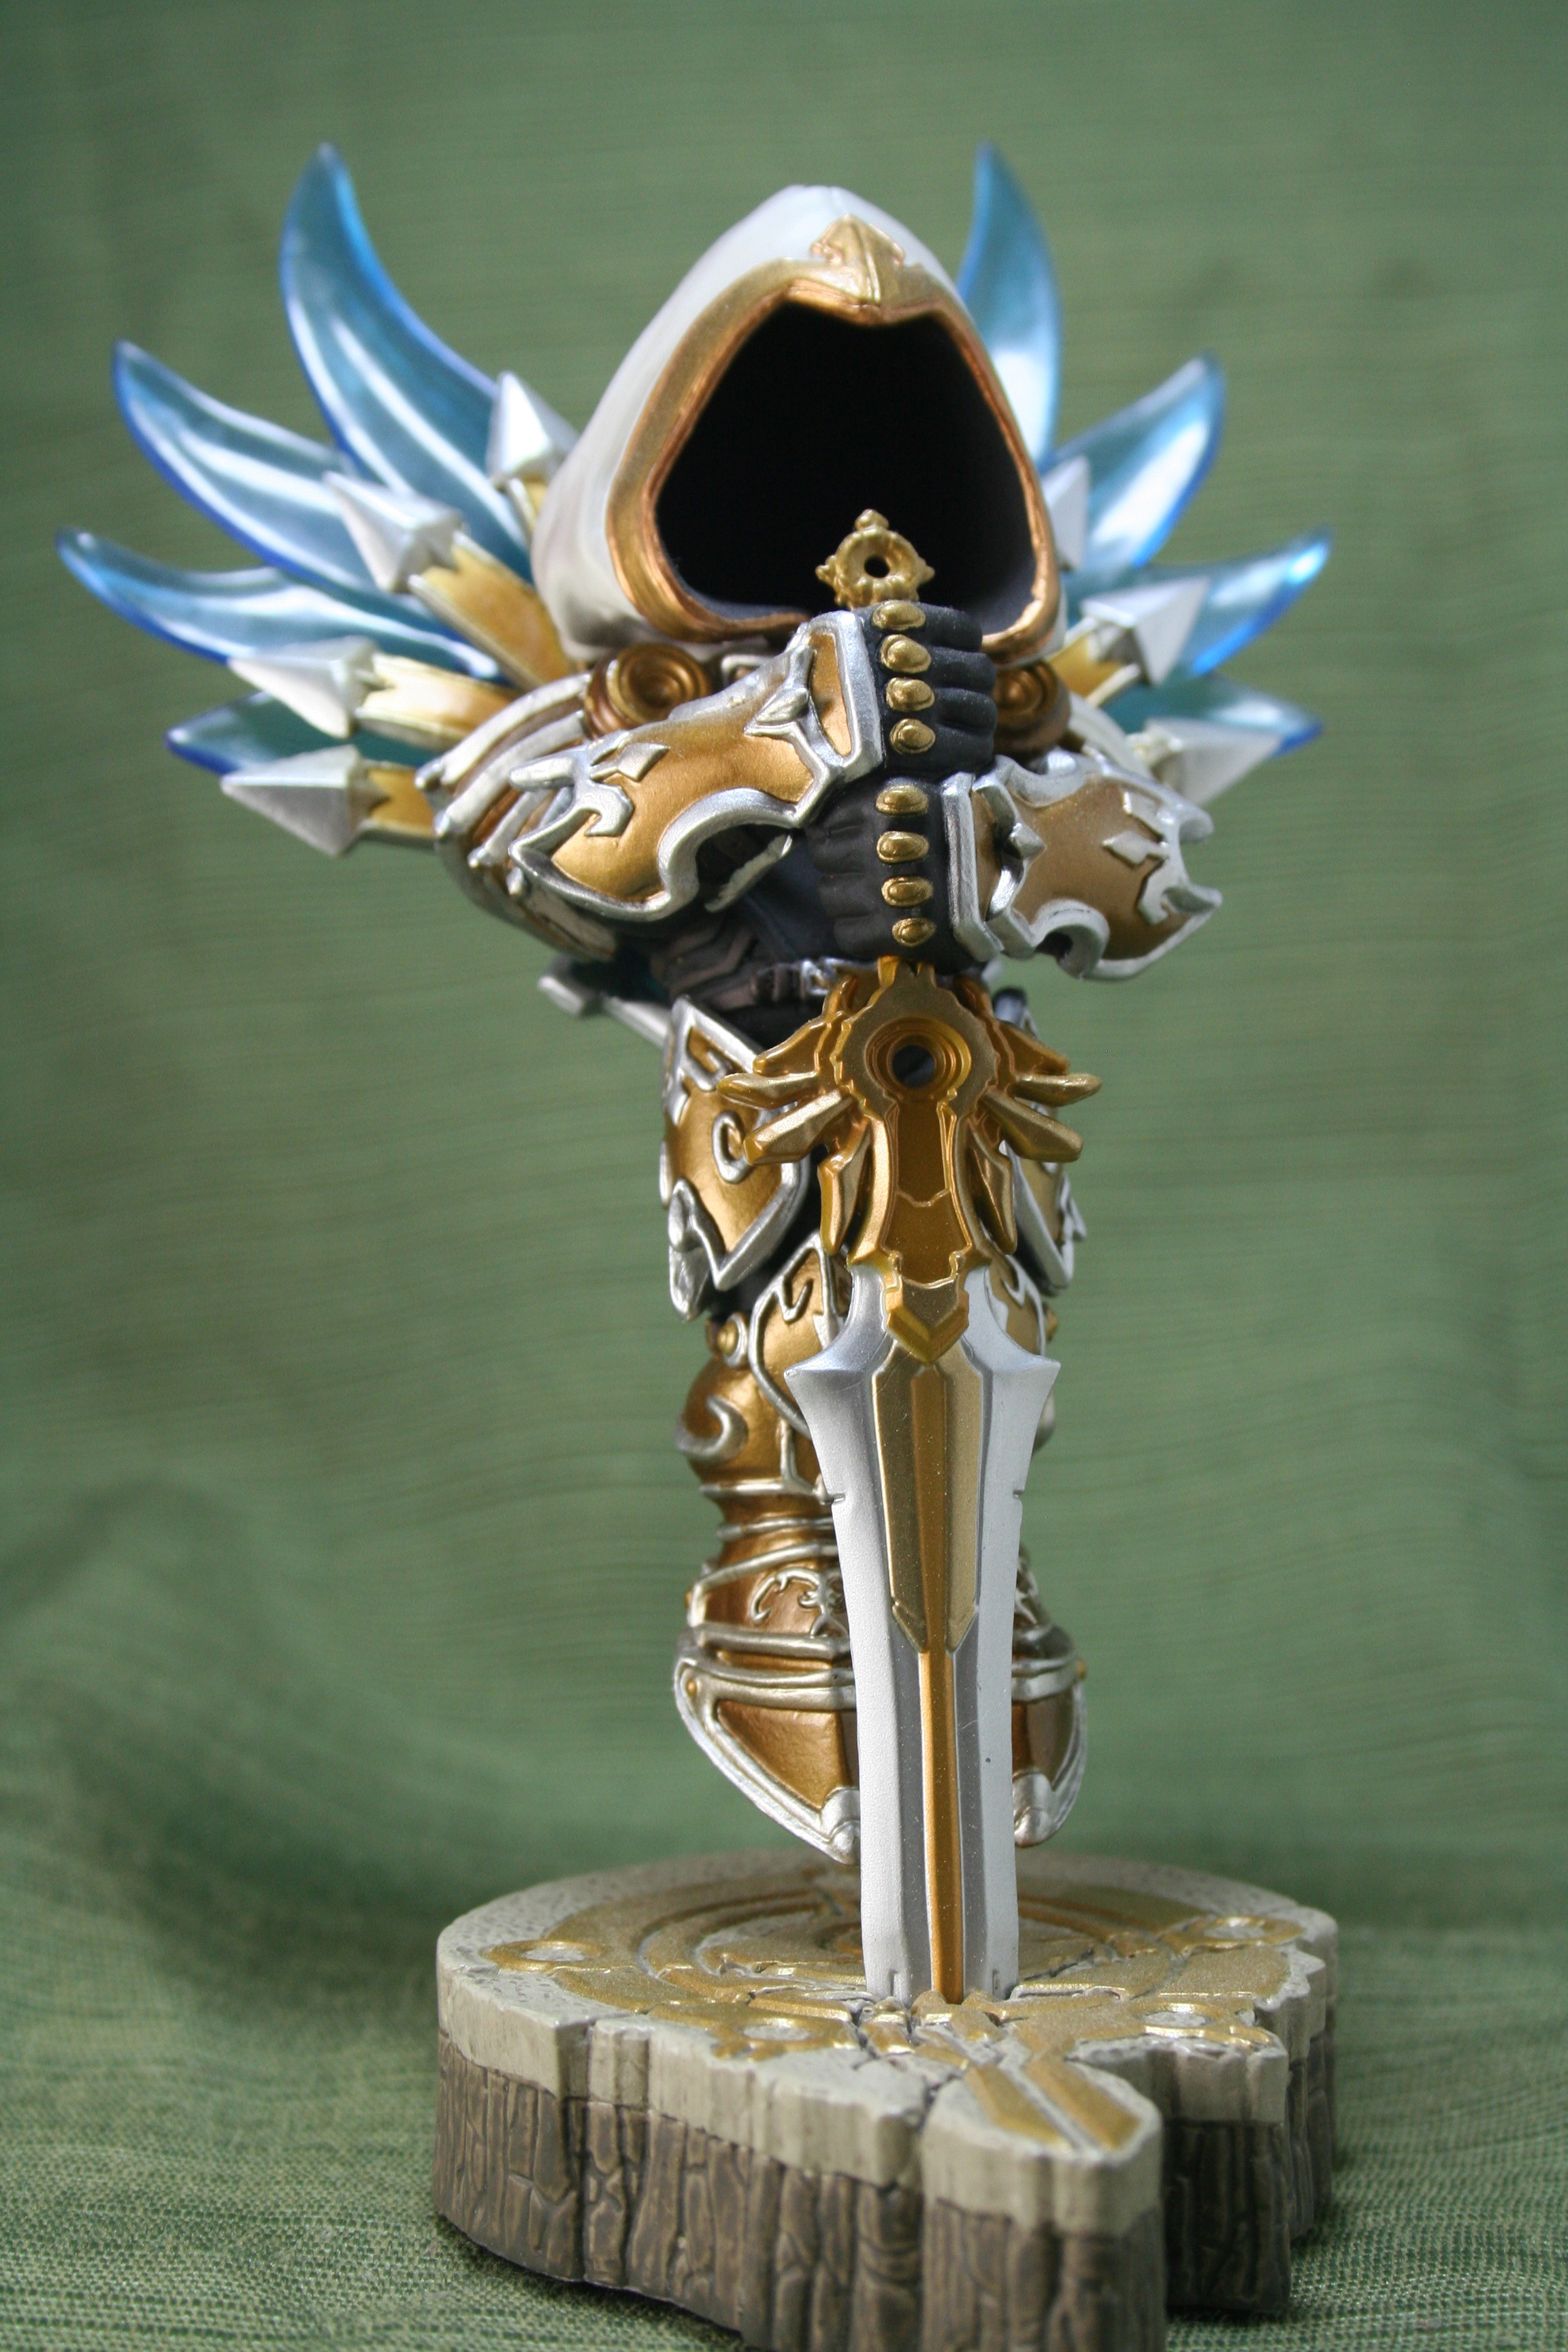
Tyrael – Diablo
So you can see that the light is definitely not yellow, and that there are no harsh, dark shadows that are the product of using only a single light source (think looking at your shadow on the sidewalk on sunny day). Now, clearly shadows still exist, especially on Tyrael’s taller model, but it’ll take some practice to get the directions of my lights figured out.
My next goal is to reduce the shadows and learn to take photos that are more interesting to look at (angles, perspectives, etc). Until then, here’s a handful of the best pictures (of my many, many dozen)! Enjoy, and keep an eye on Facebook, G+, and Tumblr for additional images in the future.
Mary Gezo
Formerly of both n00bcakes and !Blog, the two magically become one on Spatialdrift; expect some lazy baking and serious nerditude. Also, I love semicolons.