Everybody probably has their own personal list of “things I couldn’t live without” in their kitchen, so I figured I’d put in my 2 cents, at least pertaining to baking. This list will include what I think are the important tools for an every-day baker to have in his or her kitchen, along with a little discussion on what may make one tool better than another.
Measuring
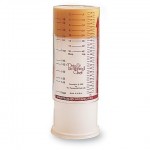
- Measuring Cups/Cylinder: Measuring cups are an obvious necessity in your baking toolkit, but I think measuring cylinders are the coolest measuring device in the world (maybe not in the world…but still cool). Not only do they get you nice precise measurements, but they also ensure that you empty out the entire measurement (as opposed to measuring cups, where you probably frequently leave a some of your ingredient left stuck inside).
- Measuring Spoons: Like measuring cups, also something important to have with your tools. I currently have a set of Pampered Chef all-in-one measuring spoons which I thought at first were super cool, only to find later that you can’t use them (well) for liquid measurements, and they tend to be a little difficult to clean. I’d suggest just getting a regular set of separate measuring spoons.
To be a “srs” (or perhaps even marginal) baker’o’cakes, I keep reading that a scale to properly measure your ingredients is really the only way to go (see my previous post on sifting flour). I think this is definitely a useful tool for your kitchen, but on the scale of items for an “every-day” or “slacker” baker, I think cups, spoons, and cylinders will suffice.
Mixing
- Mixing Bowls: Duh. You need good bowls to mix stuff up in. Remember, don’t use plastic bowls in the microwave if you happen to be melting anything!
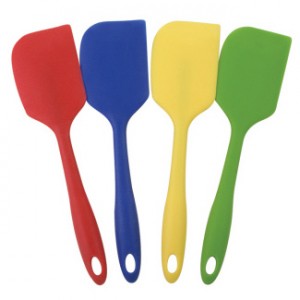
- Rubber/Silicone Spatula: I loooooove my spatulas! No other mixing/stirring implement really compares. Its rubber end makes it perfect for catching all the ingredients that haven’t been mixed in yet as well as herding every single bit of batter out of the bowl and into the pan. I don’t remember the last time I used a regular mixing spoon while baking.
- Whisk: Great for quickly mixing and de-clumping your dry ingredients. A flour sifter can similarly do this job, but you heard the discussion on sifting flour earlier.
- Hand Mixer: I believe that a trusty little hand mixer can do any necessary baking job, despite what I read in some baking books. Alton Brown (ALL HAIL THE AB) claims that a stand mixer with a spatula attachment is the only thing that can “properly” cream butter and sugar, but I have a hard time believing that. I guess “properly” is the key word here, but honestly, how can anyone expect your average home-baker to have a $200-$400 stand mixer in their repertoire, especially when a hand mixer can be as cheap as $20? Yeah yeah, I understand it’s better (and I have been on the lookout for a decently-priced stand mixer), but it always irritates me when every-day cook books say “now, turn on your stand mixer and add your eggs…”. Seriously? When did me buying a $10 book on baking cakes mean you can assume I own a completely unnecessary $200 appliance?
Baking
- Pans (Cookie, Cake, Bundt, etc): Another “duh”. Get yourself a few nice pans for whatever it is you’d like most to bake. The quality (and thus, price) of the pans you buy are completely up to you, but typically the more you spend the nicer it’ll be and the longer it’ll last. If you’re into brownies or rectangle cakes, 9×9 or 9×13 are good standard sizes to go with. For cookies, you can get specific cookie sheets that have air pockets in them that keep the bottom of the cookies from burning. IMO, a good investment.
- Greaser: Two things I want to mention here: pan greasing and parchment paper. Pan greaser is your PAM for Baking or Baker’s Joy spray that comes in a can and you can simply spray onto your pan to keep it from sticking. Parchment paper is this awesome paper you can line your pans with before putting them in the oven. It’s non-flammable and nothing sticks to it. It’s awesome. If you don’t want to pay for pan greaser you can take the time to flour your pan (that is, dusting your pan with flour before adding the batter), but this, in my experience, is annoying and time consuming…maybe I just haven’t gotten the technique down yet. It’s also frequently recommended that, if you’re using a tube or cake pan, you cut appropriately-sized circles out of your parchment paper and stick them to the bottom and sides of your pan before adding your batter.
When it comes to pan preparation, I tend to be pretty lazy. I don’t want to take the extra 5 minutes it’ll take to flour my pans and measure and cut up my parchment paper. Flouring my pans means I get flour everywhere and end up with bits of raw flour on my cake. Cutting up my parchment paper, though I did find a nifty technique from my AB baking book, is annoying because it’s a huge waste of the paper and, because the paper is always stored in a roll, difficult to handle- the paper keeps trying to curl into a tube after I put it into the pan!
All that to say: because I’m lazy and have relatively new pans, I almost always just give my pans a quick spray with PAM and have done with it. I’ve done this with both my bundt and tube pans with no maleffects. When my pans start getting older I may have more issues, but for now there’s no problems. When it comes to baking cookies, I always lay down a quick sheet of parchment paper. Cleanup has never been easier!
- Cooling Rack: Last but not least, a trusty cooling rack is always a necessity. I actually don’t have one of these yet, but it’s on my list of things to buy. A cooling rack will ensure even cooling, unlike a regular plate.
Mary Gezo
Formerly of both n00bcakes and !Blog, the two magically become one on Spatialdrift; expect some lazy baking and serious nerditude. Also, I love semicolons.


One thought on “Essential Kitchen Baking Tools”
Comments are closed.